Make Strut Cards That Attract Customers like Magnets.

Strut cards, sometimes also called showcards, are an excellent budget-friendly marketing tool. A nicely done strut card will not only grab viewer attention but also add beauty to your space.
Strut cards are versatile - you can install them at points-of-sale, restaurant tables, retail spaces, hotel receptions, waiting areas, etc. You can use strut cards in multiple ways such as marketing promotions, telling customers about a discount, informing viewers about a new product or an event, etc.
But, how do you make a fantastic strut card on a tight budget?
In this article, we will show you how to design a strut card using the EzeeGD software. We will also provide you with a downloadable template for the strut card that we create.
After going through this article, anyone would be able to come up with eye-catching designs for strut cards - no design experience or expertise is required!
Before we get started, please download and install EzeeGD. It takes less than a minute to download and complete the installation. Download here.
Make an A4 Strut Card.
Let us now design an A4 strut card. In EzeeGD, you can choose to make an A2, A3, A4, A5, A6, or use any custom size for your strut card. Once you have learned to use EzeeGD, you would be able to design any other layout for your showcard/strut card as well. Let us design the following picture:

The following steps are also demonstrated in a short video, later in this post.
1. Open a new EzeeGD project and set A4 size for your design. As described earlier, you can use any custom size or select from a list of standard sizes including A2, A3, A4, A5, and A6. The most common sizes for strut cards are A4 and A5. The size you select for your strut card will depend on where you plan to place it and how far the viewers will be. We recommend using either A4 or A5 and going bigger only if the viewer is going to be far away.
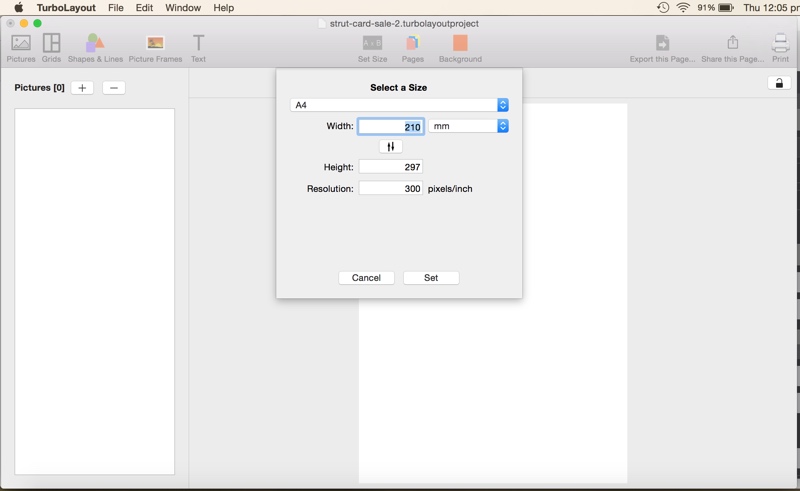
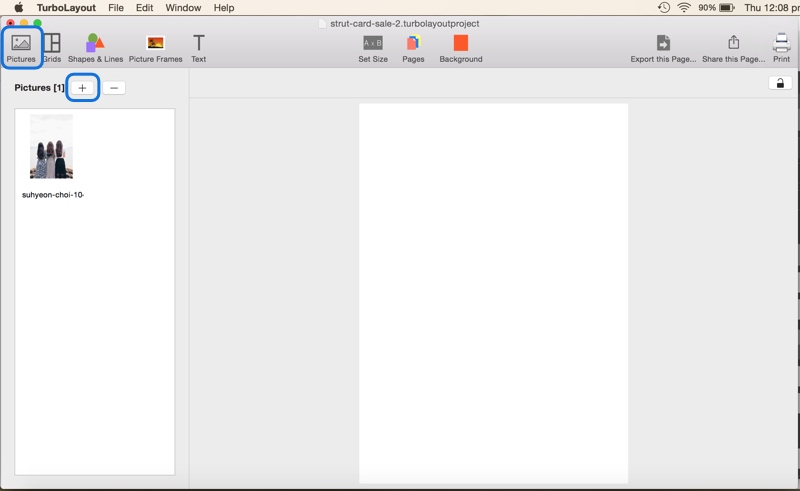
2. Go to the Pictures tab and import the picture that we plan to use in our design.
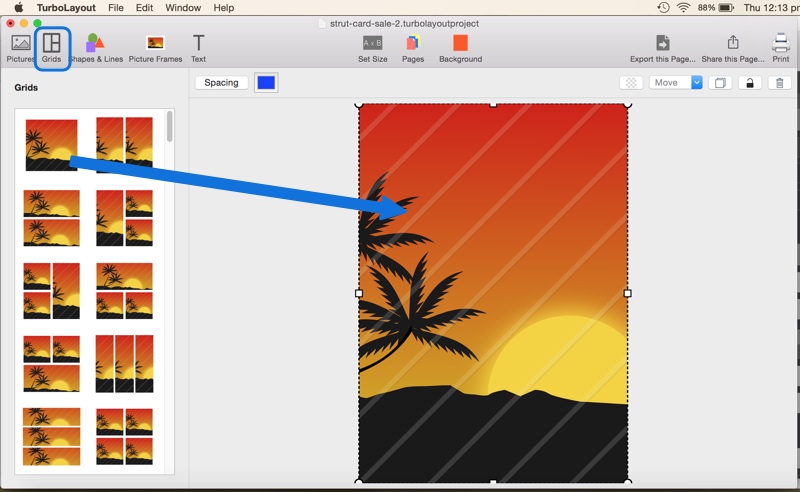
3. Go to the Grids tab and add a single picture grid. Then, position it to fill up the entire page, and set its spacing to zero. This grid will hold the background picture of your strut card.
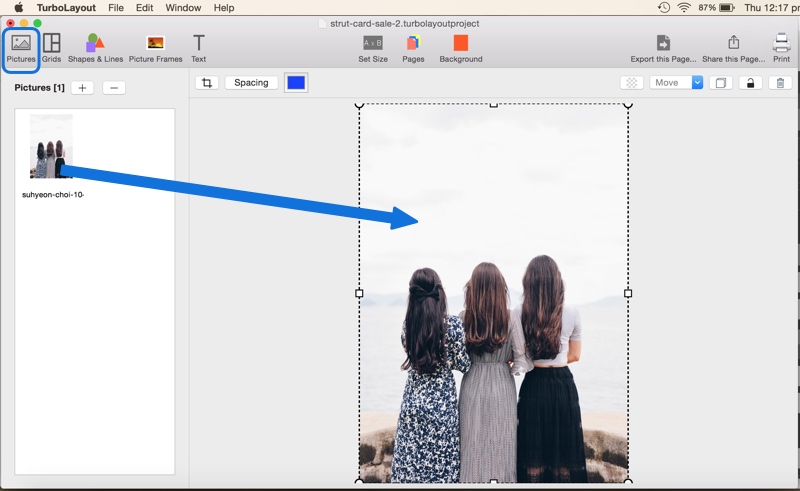
4. Go back to the Pictures tab and drag the picture that we had imported earlier to this single picture grid.
5. Go to the Shapes and Lines tab and drag a rectangle with border onto the drawing canvas.
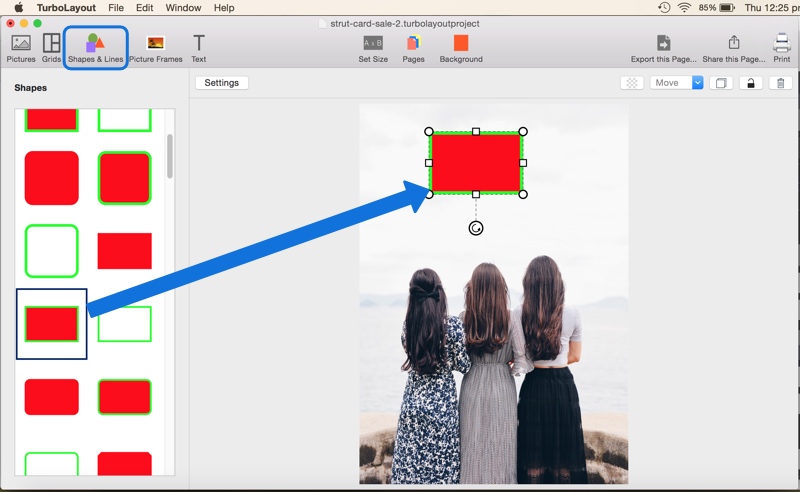
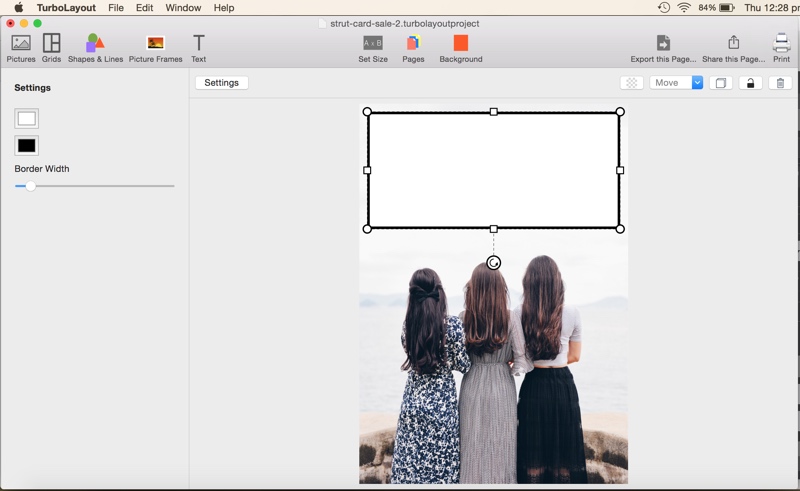
6. Position this rectangle as shown in the screenshot below and set the fill color, border color, and the border width.
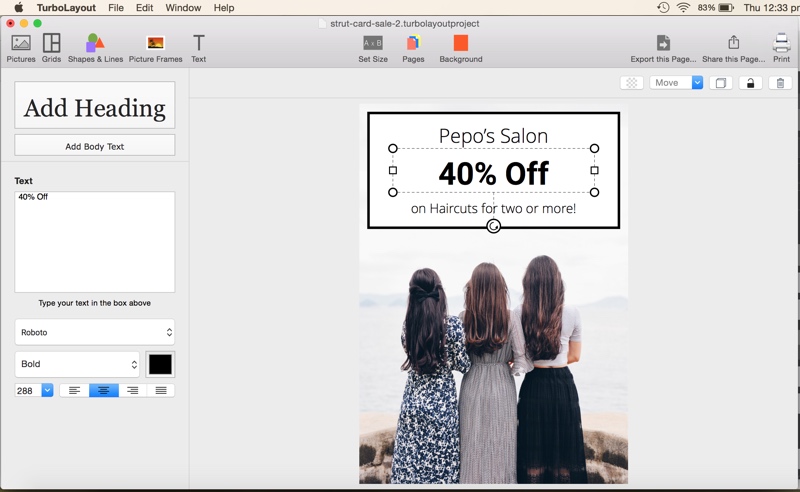
7. Go back to the Text tab and add text as shown in the screenshot below. You will have to add multiple texts for different font sizes.
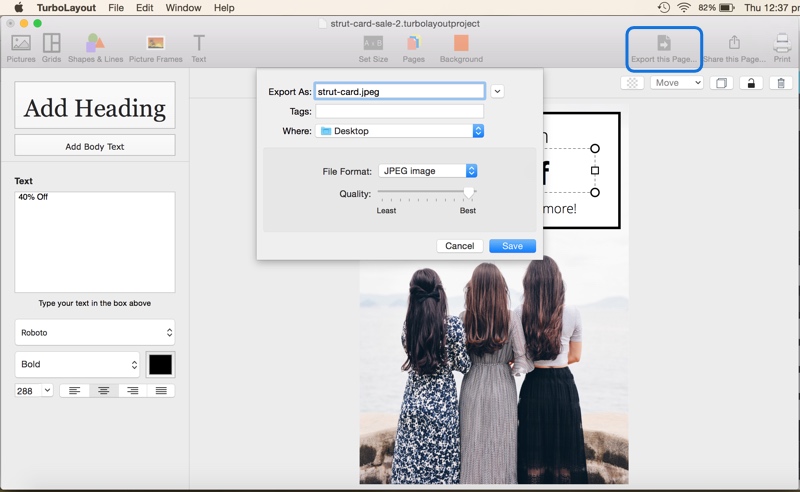
8. Your strut card design is ready! We will now export it as a JPEG image. Apart from JPEG, you can also export the design in PNG or TIFF image formats.
9. You have completed the tricky part of designing your strut card! Now, you can print and mount it on a cardboard stand available in many stationery shops or online portals. Otherwise, you can also get it printed directly from one of the numerous online strut card printing services.
Want to see the above steps in action? Here's a short video:
(Note that the software has been renamed to “EzeeGD.”)
Spend a little time learning EzeeGD, and you will be able to make eye-catching strut card designs for your business.
Don’t forget to send your comments and suggestions to ezeegd@silkenmermaid.com.

